Playit.gg Setup
Introduction
The Playit.gg platform is a powerful tool for hosting and managing game servers. With Playit.gg, you can easily set up and configure game servers on your machine. This guide will walk you through the process of installing and setting up Playit.gg on your server. Let's get started!
Prerequisites
- A stable internet connection
- Root access to your server (Recommended)
Linux Server: If you do not already have a Linux Server setup you can follow this guide, to do so.
You may also run the playit service on macOS or Windows. However, we will not cover this process here. For more information visit playit.gg (opens in a new tab).
Step by Step Guide
Create an Account
Head to playit.gg (opens in a new tab) make an account then navigate to the
download tab.
Install the playit Package
Once on the download page, copy the code inside the
Debian Install Script (apt-get) box then paste it into your terminal.
If you get a warning in apt about playit's repo, please visit playit.gg
GitHub
repo (opens in a new tab)
before running apt install playit
sudo apt install gpg -y
curl -SsL https://playit-cloud.github.io/ppa/key.gpg | gpg --dearmor | sudo tee /etc/apt/trusted.gpg.d/playit.gpg >/dev/null
echo "deb [signed-by=/etc/apt/trusted.gpg.d/playit.gpg] https://playit-cloud.github.io/ppa/data ./" | sudo tee /etc/apt/sources.list.d/playit-cloud.list
sudo apt update
sudo apt install playit
After you have installed the playit.gg package, run the following commands to
start the service and setup your agent:
systemctl enable --now playit.service
playit setup
You will be prompted with a claim URL which you need to open in your browser.
Copy or CTRL+Click the URL to open in your browser.
Once you opened the URL you are guided through the process of setting up your
agent. Follow the steps until you get to the Create agent button.
We suggest leaving all defaults, for a plug n' play experience. However, users are encurraged to customize the agent to their needs.
Create Your First Tunnel
Step 4 of the guided setup process present the user with a button. Click the
Create Tunnel button to start creating your first tunnel.
Playit.gg's free tier does NOT include the Use Dedicated IP option. But in
my experience the free shared IP does not change, and therefore can easily be
mapped to a domain name using something like Cloudflare
DNS (opens in a new tab).
Once the Add Tunnel model is open, select your prefered IP option, Region
and Tunnel Type. I will be using the Use Shared IP option, the
Global Anycast (free) Region and the Minecraft Java (game) Tunnel Type.
Please check with your applications requirements for the appropriate Tunnel Type.
Finally click Add Tunnel.
At this point you may also close out of the playit setup, using CTRL+C. The
service will continue running the background.
Configure Your Playit Tunnel
After you have added your tunnel, you can configure it if you wish. It should work without further configuration, but since I like specificity I will configure it more.
Under the Tunnels tab you will find all of your tunnels. Select the tunnel you
just created.
At the top of the screen you will find a domain name and an IP address and
port. You can use either to connect to you tunnel and in turn the server which
your agent and application is running on, from within game.
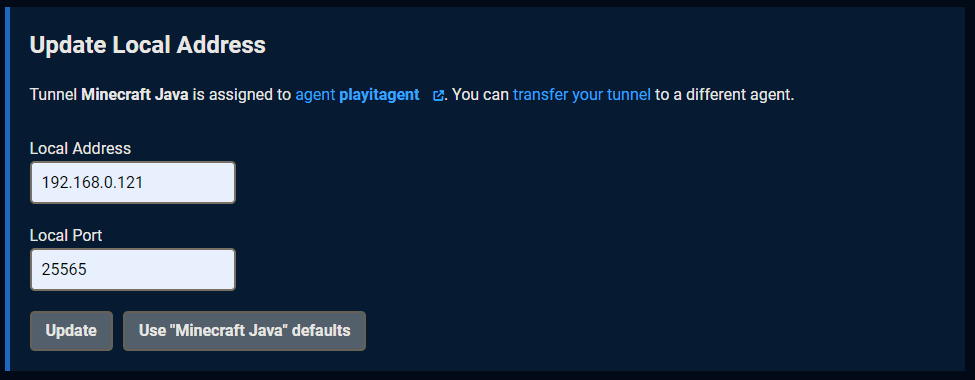
When scrolling down you will find the Update Local Address section. Here you
can edit the local address of your server.
Since I have select the Minecraft Java (game) Tunnel Type the default
values for Local address and Local Port are set to 127.0.0.1 and 25565.
Which are the localhost loopback IP of your server, and the default Minecraft
port, respectively.
I will set the Local Address value to the local network IP address of my
server. I will keep the Local Port value default since I plan to run a
Minecraft server.

After you have configured the values to your liking, click the Update button.
Conclusion
You're all set! Congratulations, you've successfully set up playit.gg on your Linux Server. You are now ready to host game servers, and other services, from you local network while looking like a professional service provider!
Next Steps
For your next steps we recommend using the NPM guide to setup a reverse network proxy. This paired with a Cloudflare domain name will elevate your server hosting to another level.
Happy Hosting!